
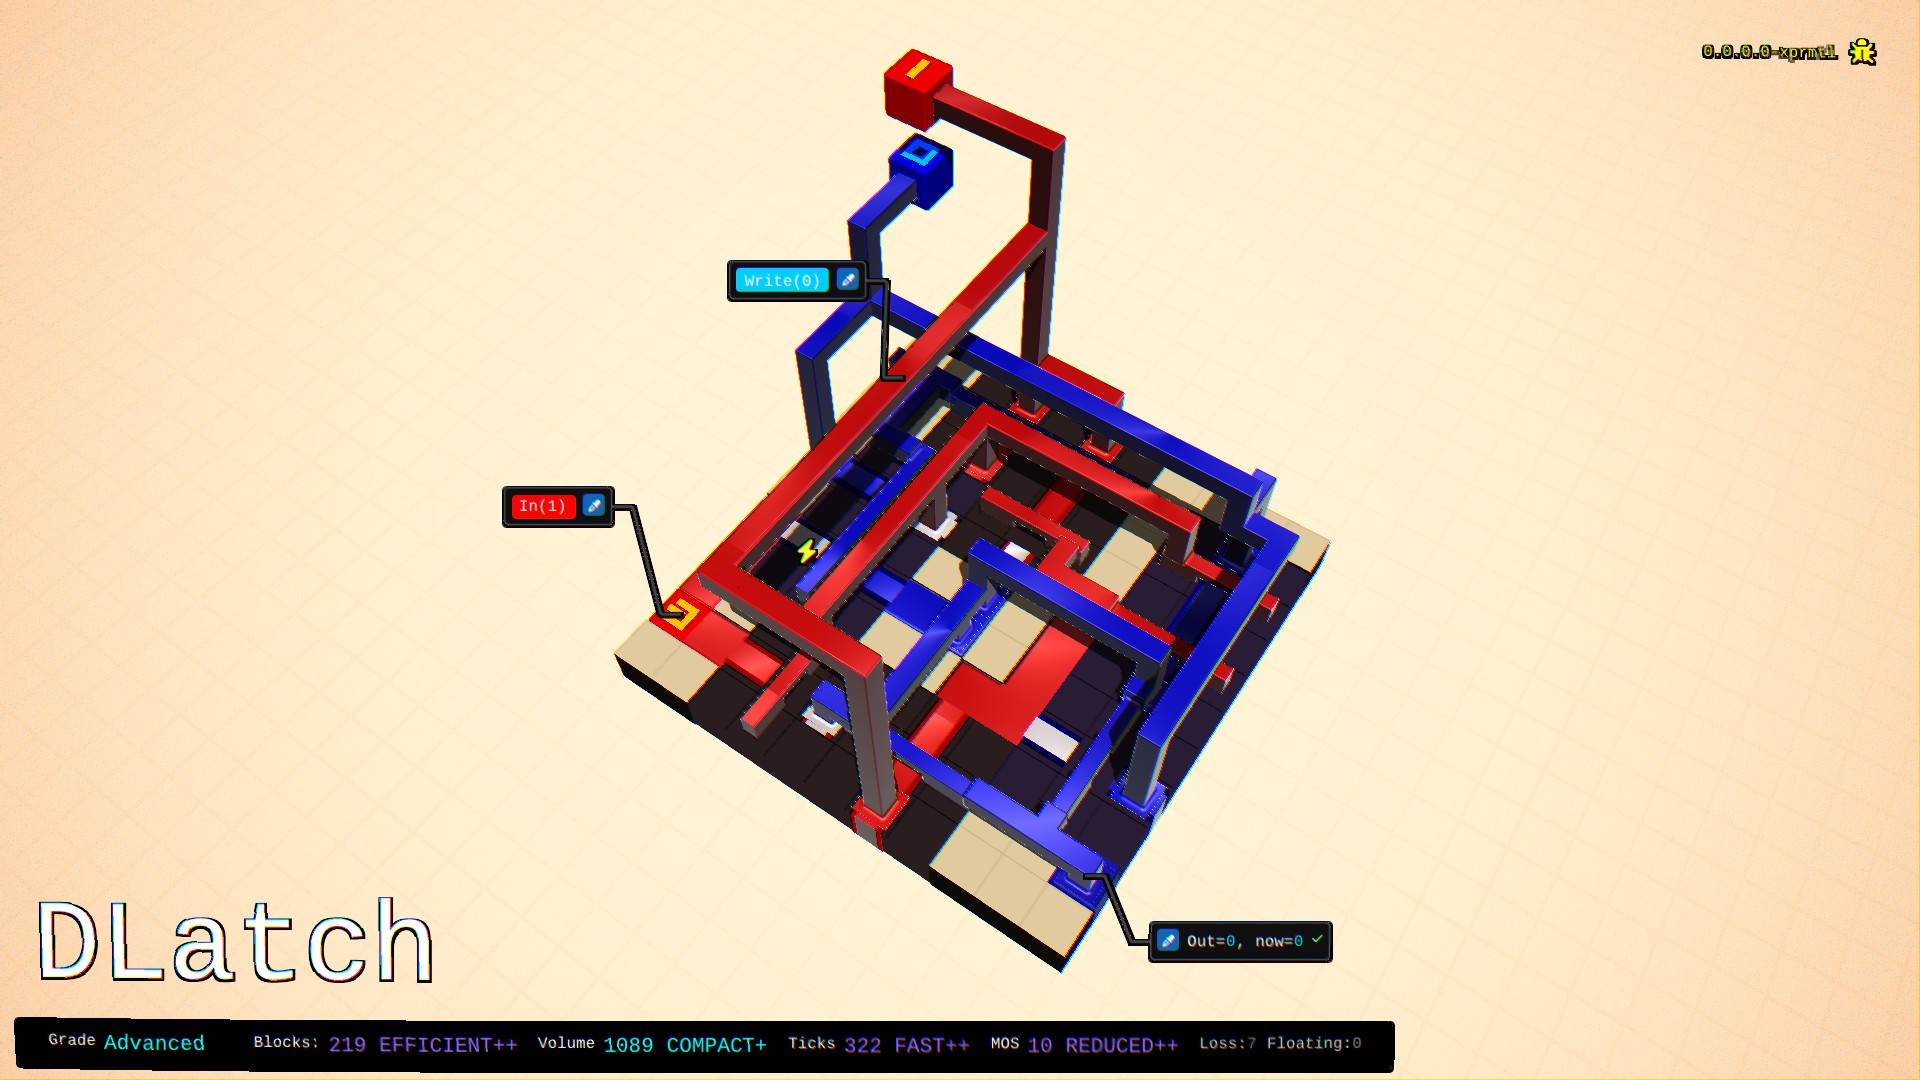
To import Right Click, Copy Image Address, then Load button from the Library, HCDrives tab!

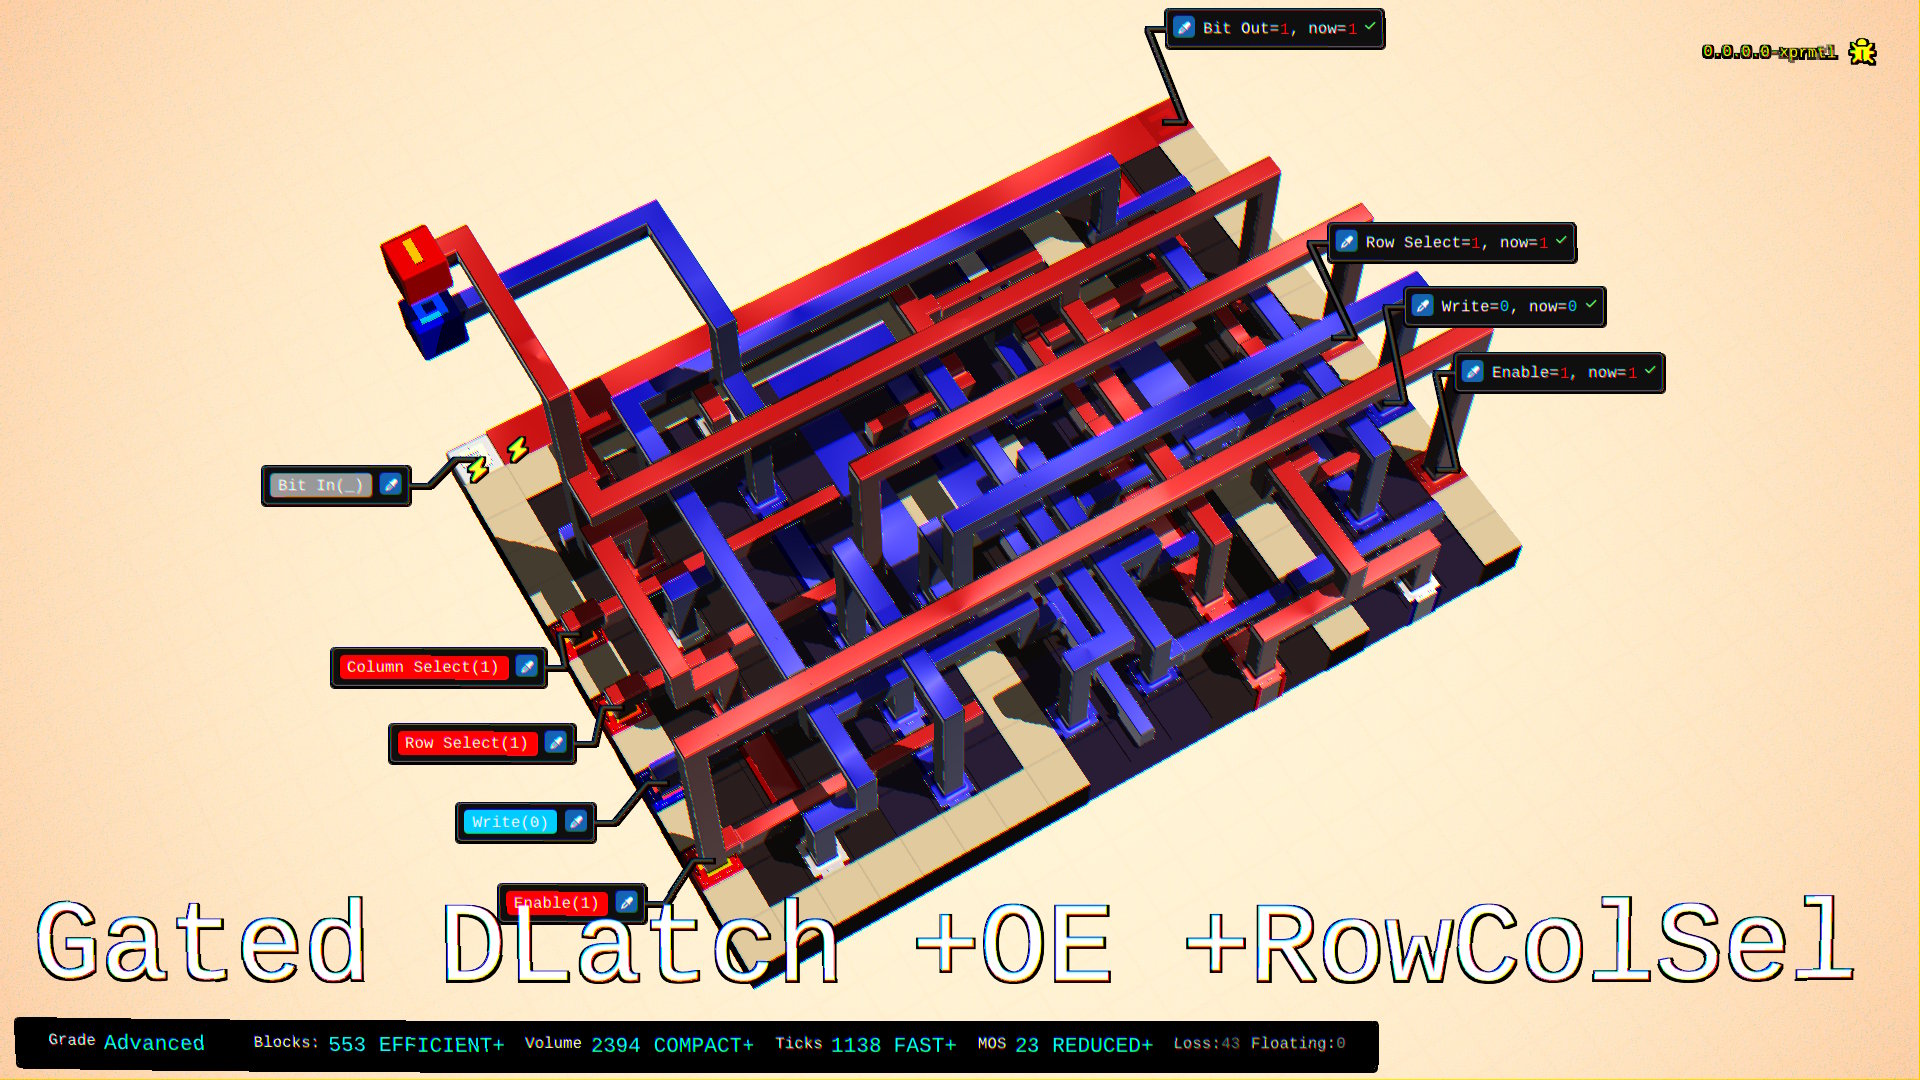
To import Right Click, Copy Image Address, then Load button from the Library, HCDrives tab!

To import Right Click, Copy Image Address, then Load button from the Library, HCDrives tab!

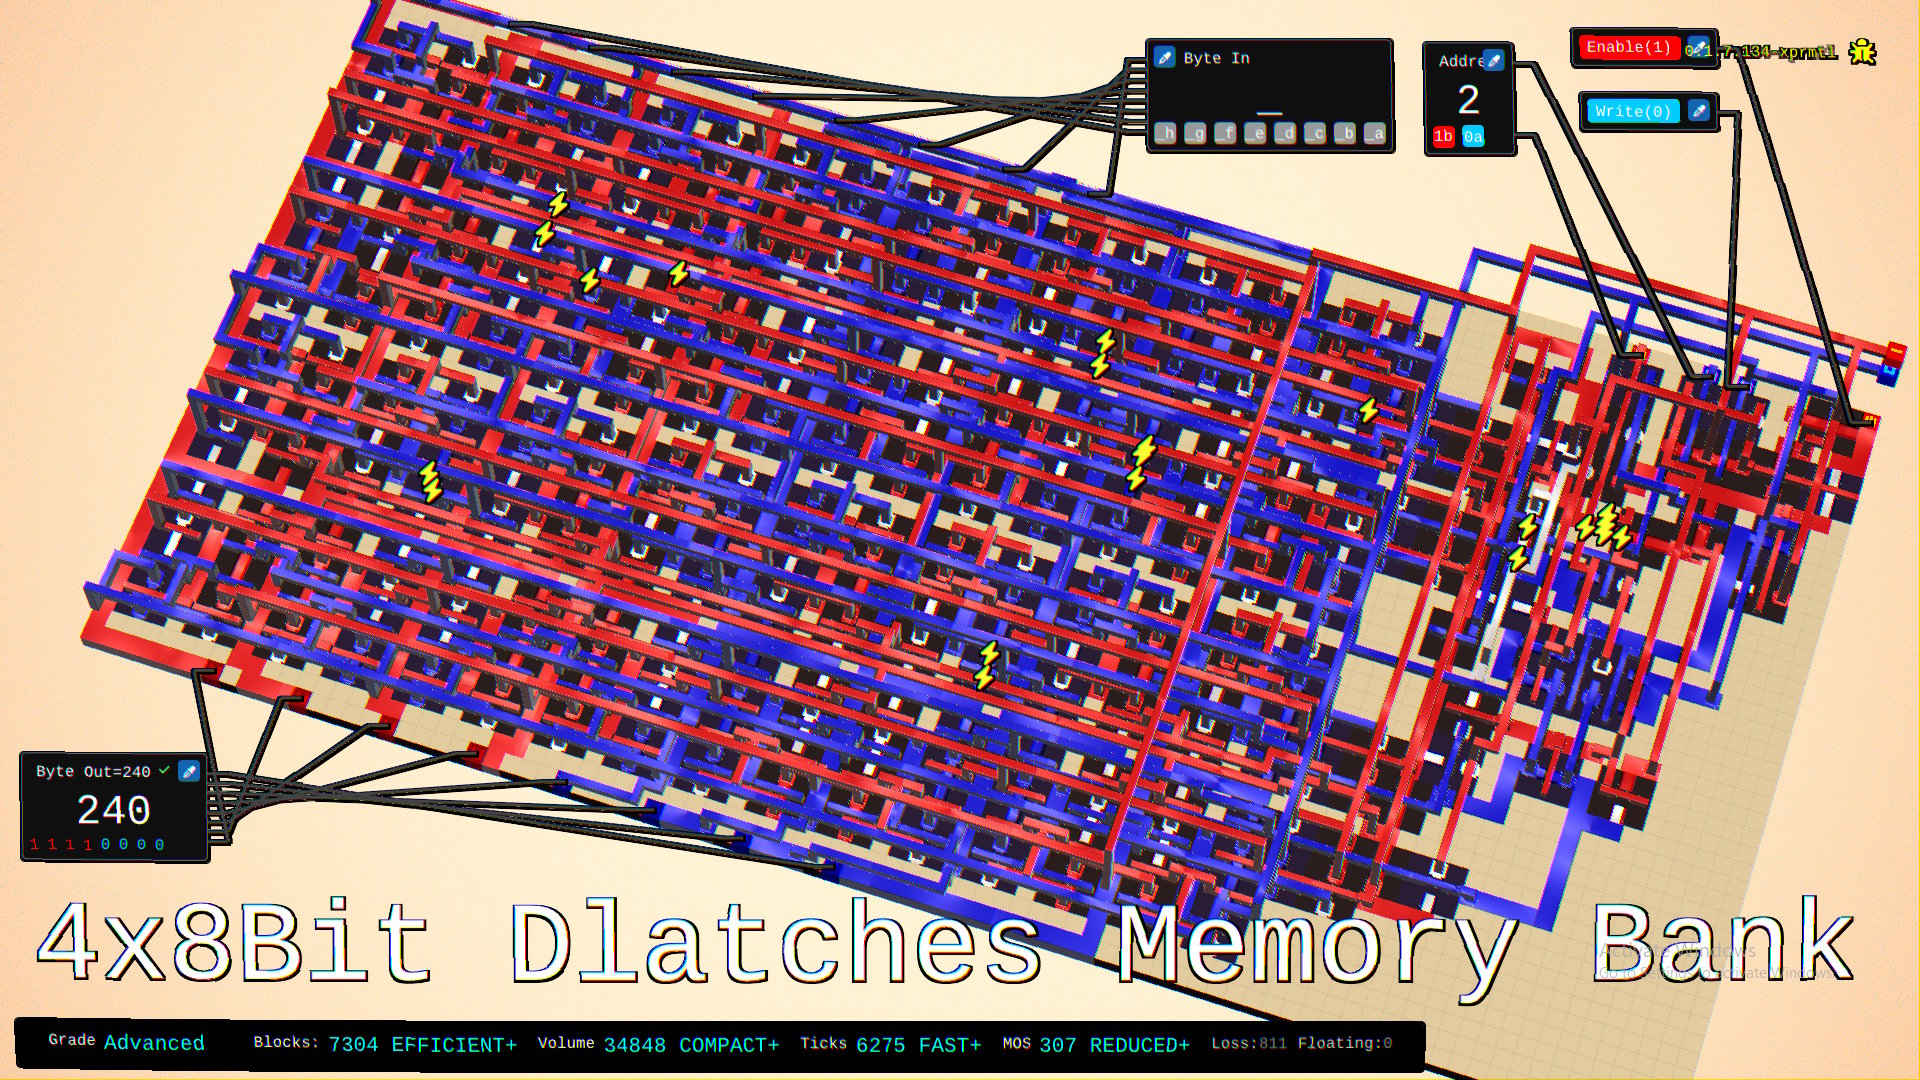
To import Right Click, Copy Image Address, then Load button from the Library, HCDrives tab!
Every submission is measured on four key performance metrics (lower is better):
Each metric contributes to your overall score with these weights:
All scoring uses a special system player Sub Process (Ref Naïve) as the baseline worst-case reference point. This ensures consistent and fair scoring across all weeks.
The second special system player Process Prime (Ref Best) serves as the starting best-case reference point, representing a high-performing solution. Beating it is a significant achievement.
Each week's challenge is scored independently:
Your overall gauntlet ranking is the sum of all your weekly scores:
Each metric tab (Ticks, Blocks, Volume, MOS) displays specialized rankings:
Each metric is converted to a 0-100 scale using this formula:
Score = 100 - ((YourValue - BestValue) / (WorstValue - BestValue)) × 100
Important: The normalization ranges work differently for best and worst values:
If tick counts range from 50 (best player) to 500 (Sub Process baseline):
A: Yes! Only your best overall score per week counts.
A: You can still compete in future weeks, but you'll miss that week's points toward your gauntlet total.
A: Because your best tick-optimized design might use more blocks than your best block-optimized design. The system tracks your best performance in each category separately.
A: Create balanced designs that perform well across all four metrics, with extra emphasis on tick count. Check metric ranges to identify areas for improvement.
| # | Agent | Total Pts | Ticks Pts | Blcks Pts | Volm Pts | MOS Pts | FL/OS | Date |
|---|
| # | Agent | Ticks | Blocks | Volume | MOS | FL/OS | Date |
|---|
| # | Agent | Ticks | Blocks | Volume | MOS | FL/OS | Date |
|---|
| # | Agent | Ticks | Blocks | Volume | MOS | FL/OS | Date |
|---|
| # | Agent | Ticks | Blocks | Volume | MOS | FL/OS | Date |
|---|
| # | Agent | Total Score | Tick Score | Block Score | Volume Score | Transistor Score |
|---|
*last update (loading...)